BoltRing LNbits Setup
LNbits is a free, open-source lightning account system with Bolt Card support. This guide shows you how to pair your BoltRing with the LNbits Bolt Card extension.
Security notice
In this guide, we use a public demo installation of LNbits, which means you must trust the service operators to guard your satoshis. Don´t be reckless; use it with caution and only for testing with small amounts.
Use your own LNbits server
You can also use this guide to pair your BoltRing with your self-hosted LNbits server. But be aware that your LNbits server has to be publicly reachable over clearnet with a https URL. A default Umbrel installation of LNbits will not work!
Step 0 - Requirements
- An existing Lightning Wallet that you can use to fund your LNbits account
- A Mobile Phone with NFC support to provision your BoltRing
- A BoltRing that has not been set up yet (or has been wiped)
Step 1 - Install Bolt Card Creator
If you have an Android phone install the Bolt Card NFC Card Creator App from Google Play. If you are using an iPhone install the Boltcard NFC Programmer from the App Store.
You will need this app later to write the bolt service configuration to the BoltRing. You will also need the NFC UID of your BoltRing for this set-up. You can either find it on the front page of the leaflet that came with your BoltRing or you can scan the BoltRing to get the NFC UID.
If you already have your UID and are in a hurry, you can skip this section and continue with step 2.
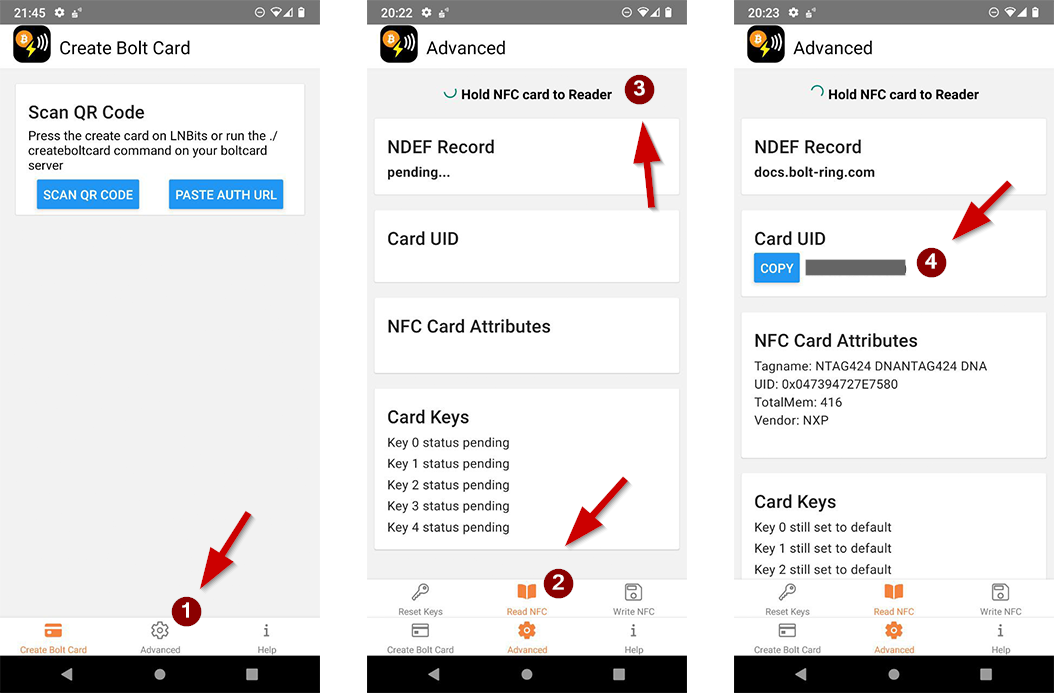
Read BoltRing NFC UID
Using the Bolt Card Creator/Programmer App:
- Select the
Advancedtab at the bottom of the start screen of the Bolt Card Creator App - Select the
Read NFCtab on the stacked menu - Scan your BoltRing by holding it to the back of your phone
- Take note of the UID of your BoltRing
Memorize the NFC antenna location
Smartphones have their NFC antenna in different places. Usually, it is in the upper third of the back of the phone. While scanning the BoltRing, pay attention to the position the app detects the BoltRing. Knowing the antenna position will give you more confidence when writing the configuration to the BoltRing later.
Error: This NFC card has not been formatted.
If you get this error, you can use the NXP TagWriter App to erase and format your tag as NDEF.
Step 2 - Create an LNbits Wallet
Do these steps from a PC
The guide assumes you create your LNbits wallet from a desktop PC.
- Browse to https://legend.lnbits.com/ (or your own LNbits installation)
- Type a memorable name for your wallet
- Click
ADD A NEW WALLET - Take note of your Wallet-URL
Secure your Wallet-URL
The LNbits wallet you created does not have a password-protected login. The Wallet-URL shown in the browser after completing the setup IS YOUR PASSWORD/LOGIN. So please make a backup of the full Wallet-URL and keep it a secret.
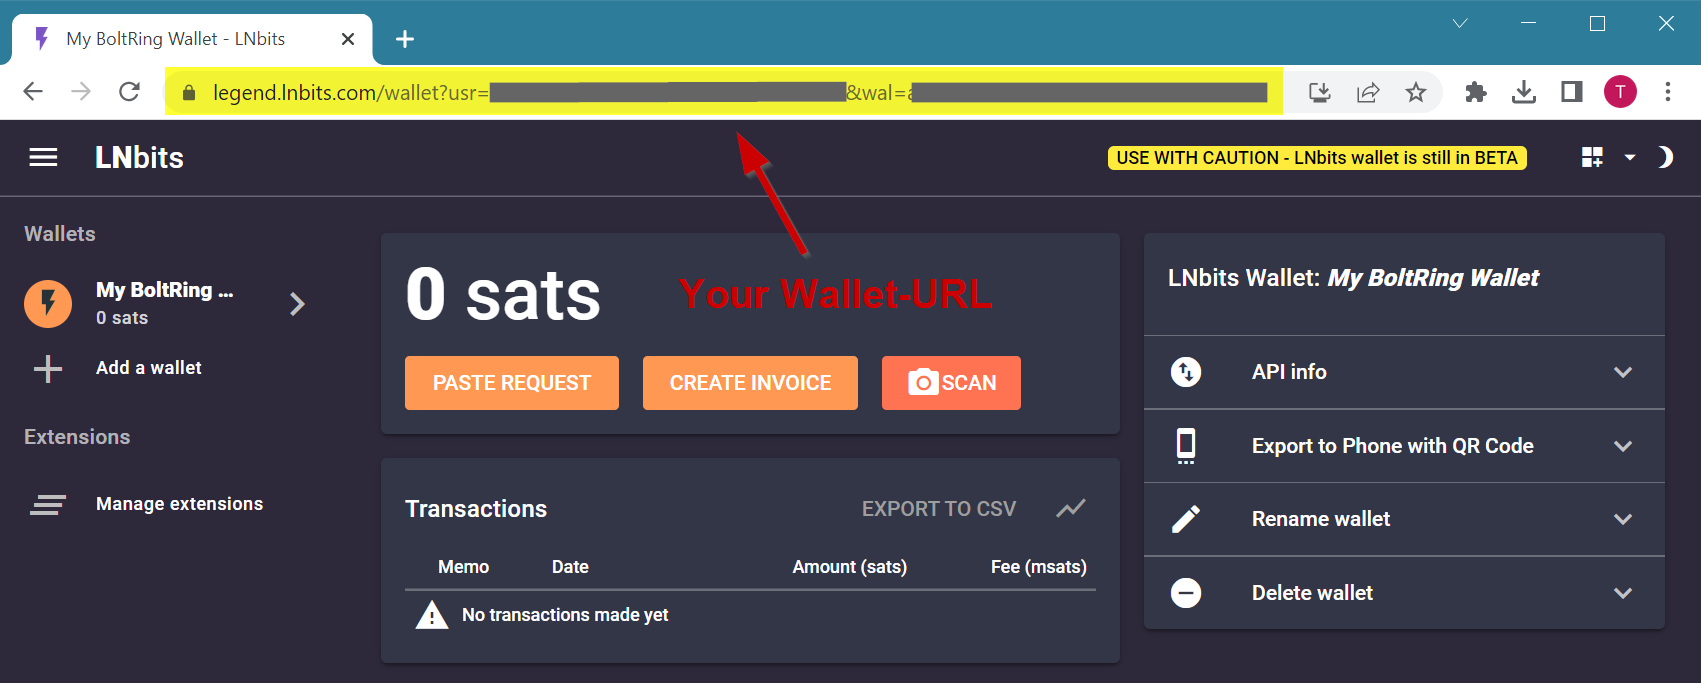
Step 3 - Fund Your Wallet
Click the CREATE INVOICE button and send some satoshis to your LNbits wallet.
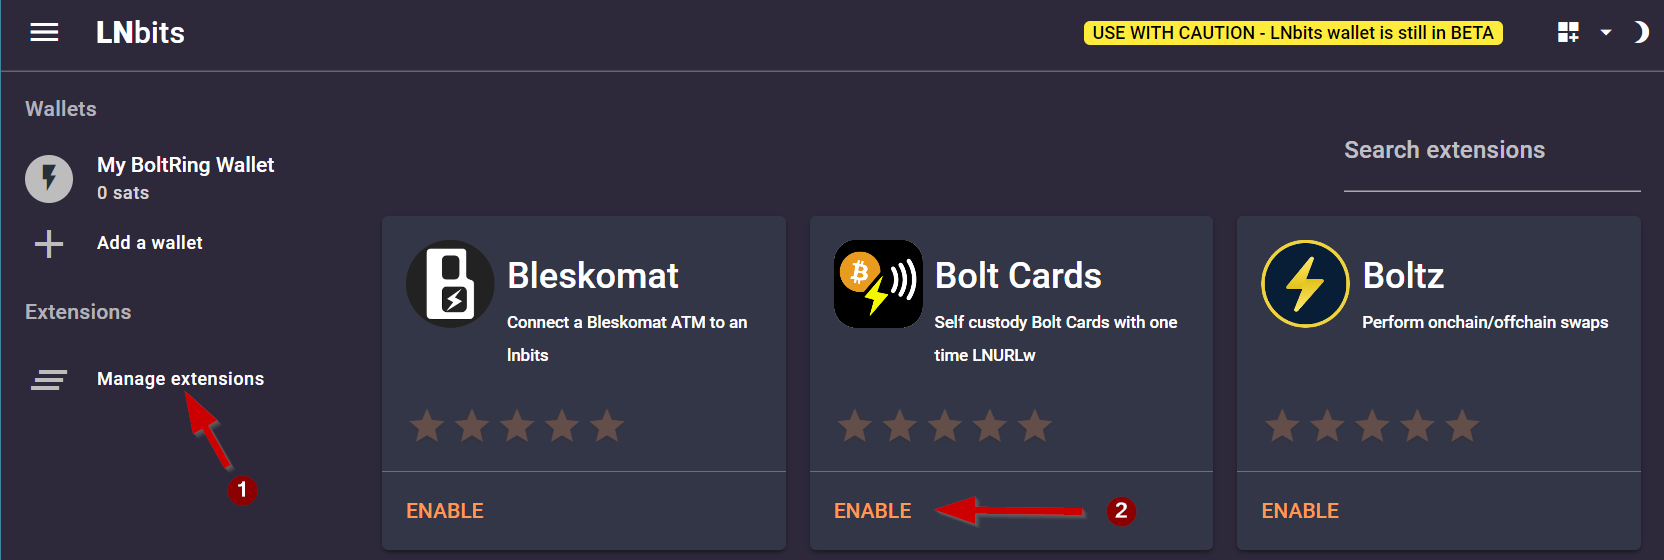
Step 4 - Install Extension
Activate the LNbits Bolt Card Extension for your wallet as follows:
- Click on
Manage Extensionsin the left menu - Click
ENABLEon the Bolt Cards tile - Click
OPENor the newBolt Cardsitem in the left menu
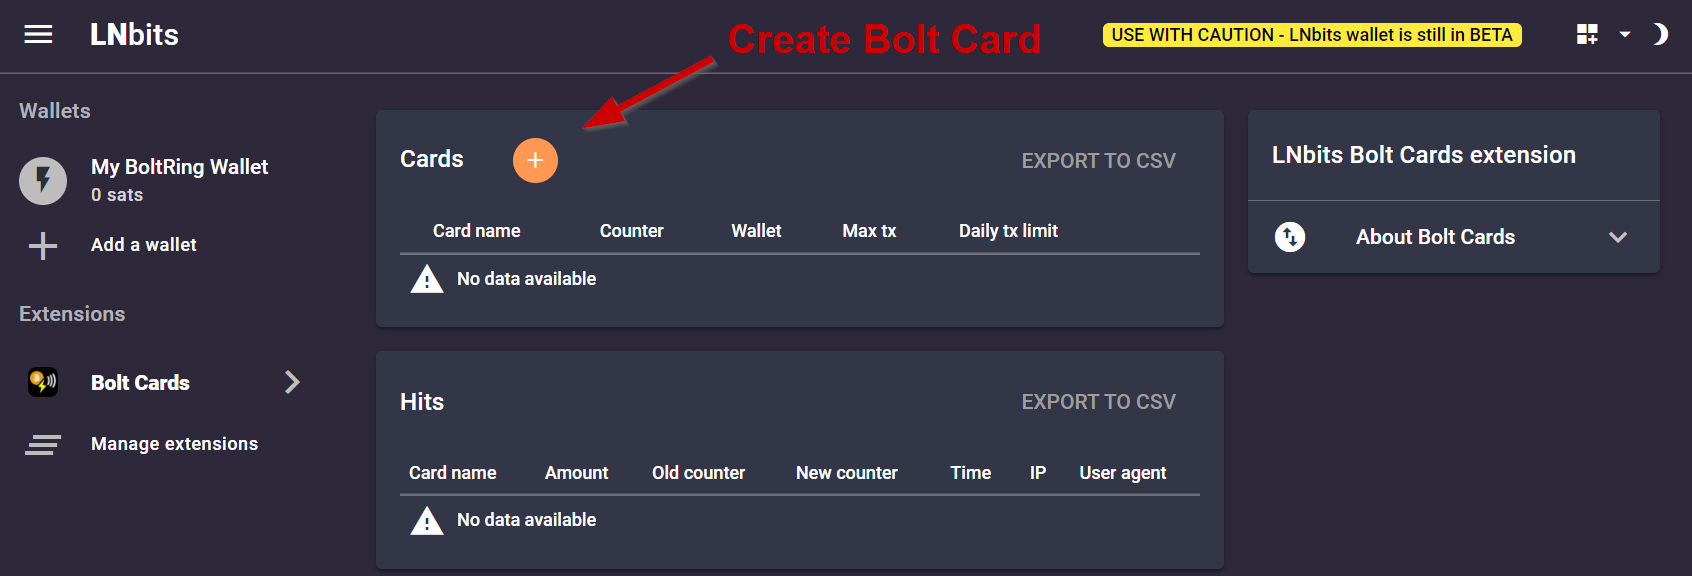
Step 5 - Create Bolt Card Service
- Click the orange
plusbutton on the Bolt Cards Extension screen
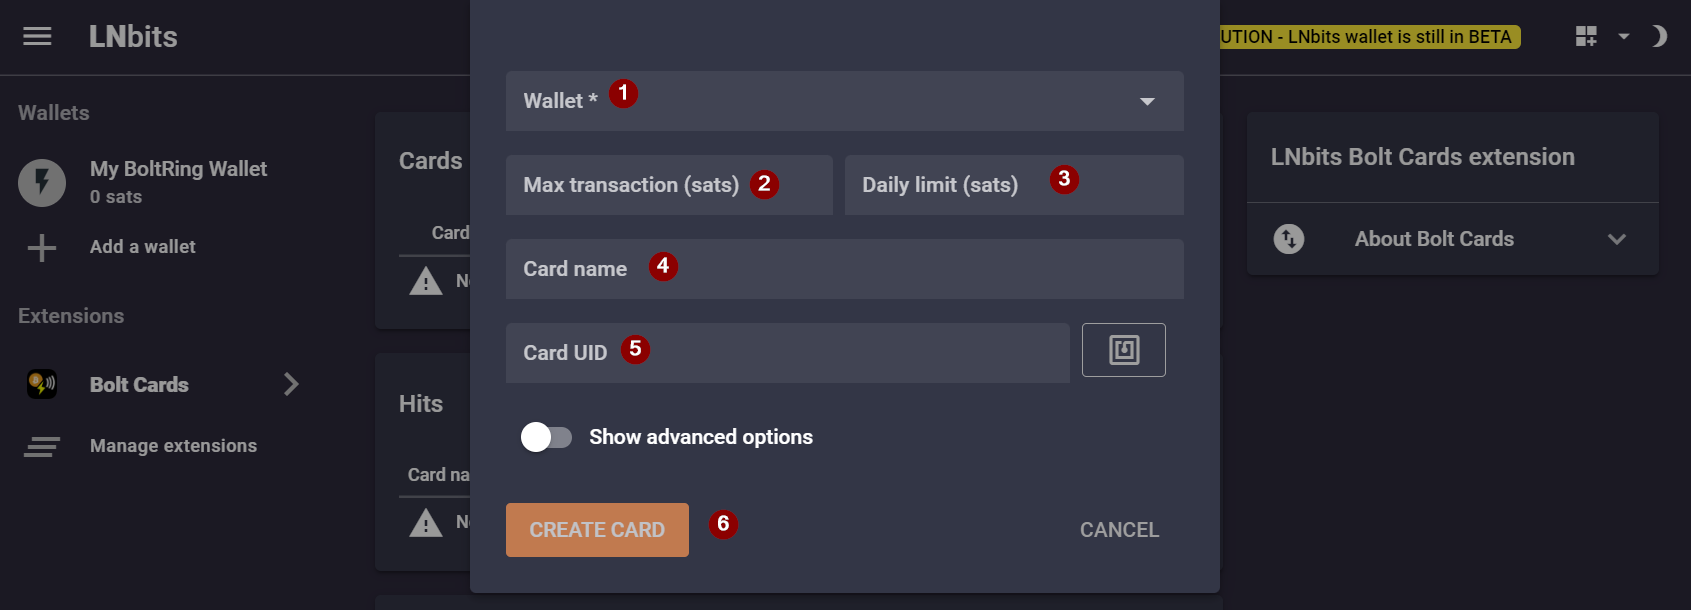
On the card creation form:
- Select the LNbits wallet you created before
- Set a limit of satoshis per transaction (for example, 100 000)
- Set a limit of satoshis per day (for example, 600 000)
- Type a memorable name for your BoltRing
- Enter the NFC UID of your BoltRing
- Click
CREATE CARD
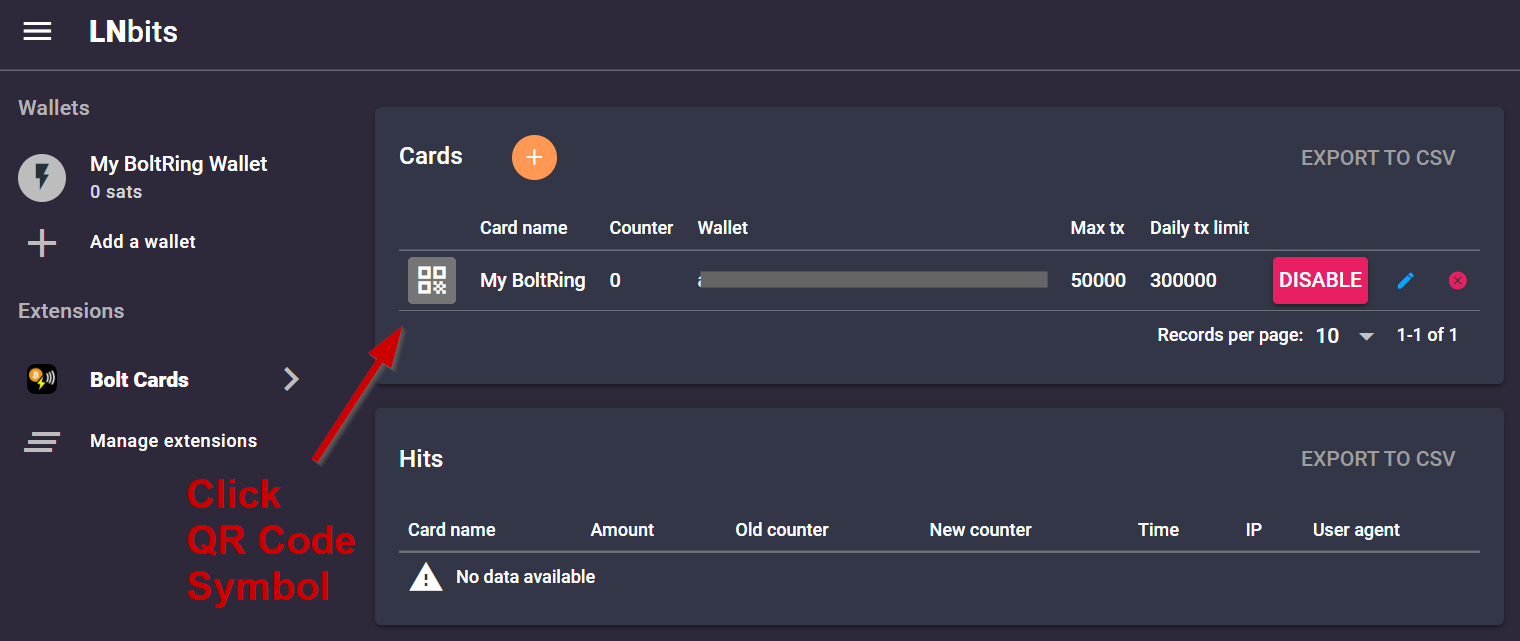
After clicking CREATE CARD, you should see the card service created. Click the QR Code in the
first column of the list to show the QR code you need in the next step.
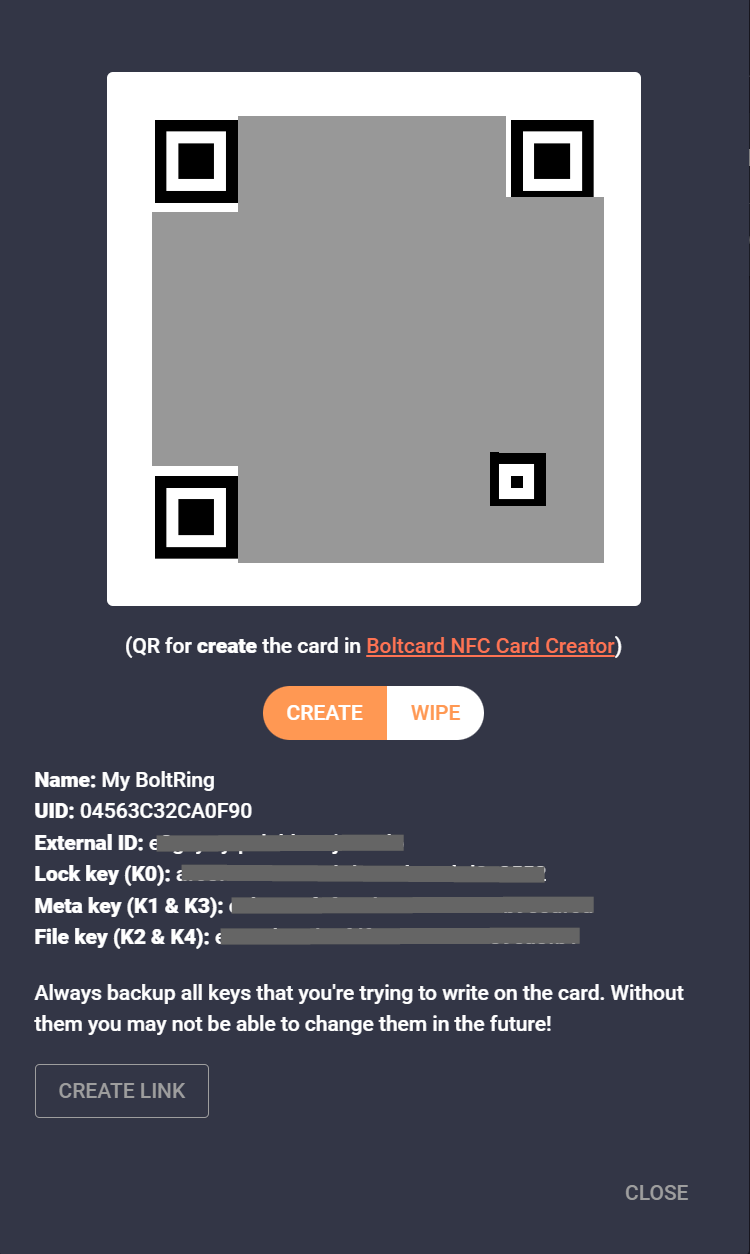 After clicking the QR code symbol, you should see this card creation popup.
Make sure you back up the keys shown below the QR code. You will need them to reset/wipe your BoltRing later. Should LNbits become unavailable, these keys will be the only way to recover/reset your BoltRing.
Keep the popup window open; you will need to scan the shown QR code in the next step.
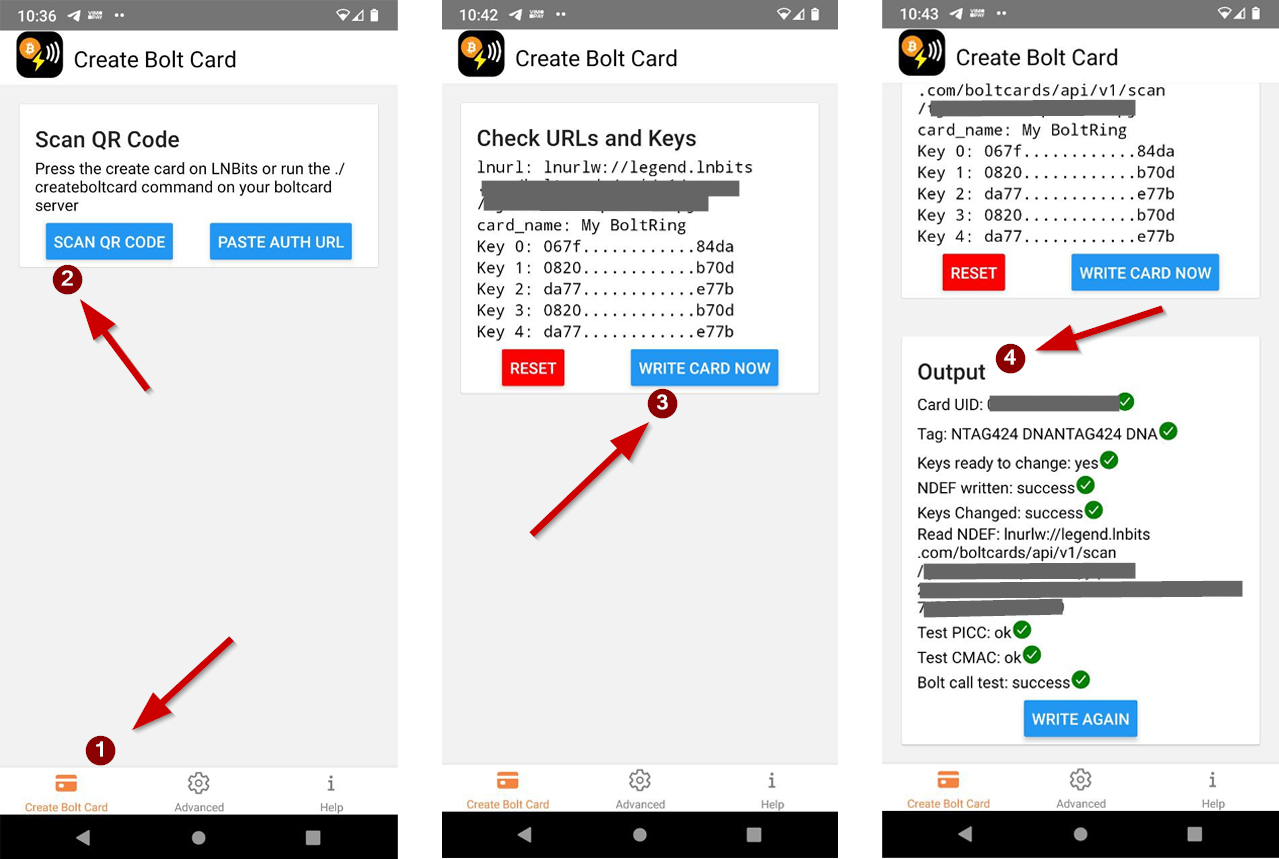
Step 6 - Pairing Your BoltRing
Now you will pair you BoltRing with the LNbits BoltCard Extension. Go to your mobile phone and start the Bolt Card Creator App you installed earlier. Place your BoltRing on a table, so it is ready to be paired.
Warning
Please make sure you go through these last steps in one go, because the QR code from the previous step will be invalidated when you scan it. Make sure you position your phone above the BoltRing at the correct place in a steady fashion and long enough for the pairing to complete. If you close the App before writing the pairing data to the BoltRing, you must start over from step 5 and create a new card service entry.
TIPS: NFC chip writing
Important: If writing to the BoltRing NFC chip is interruped you may end up with a defect ring. Be sure to:
- Remove any cover or shell from your phone before configuring your BoltRing.
- Find out where the NFC chip antenna is positioned in your phone (using read tests).
- Put the BoltRing on a table and the phone´s antenna on top of it in a stable position.
- Wait a few seconds after writing before moving your phone.
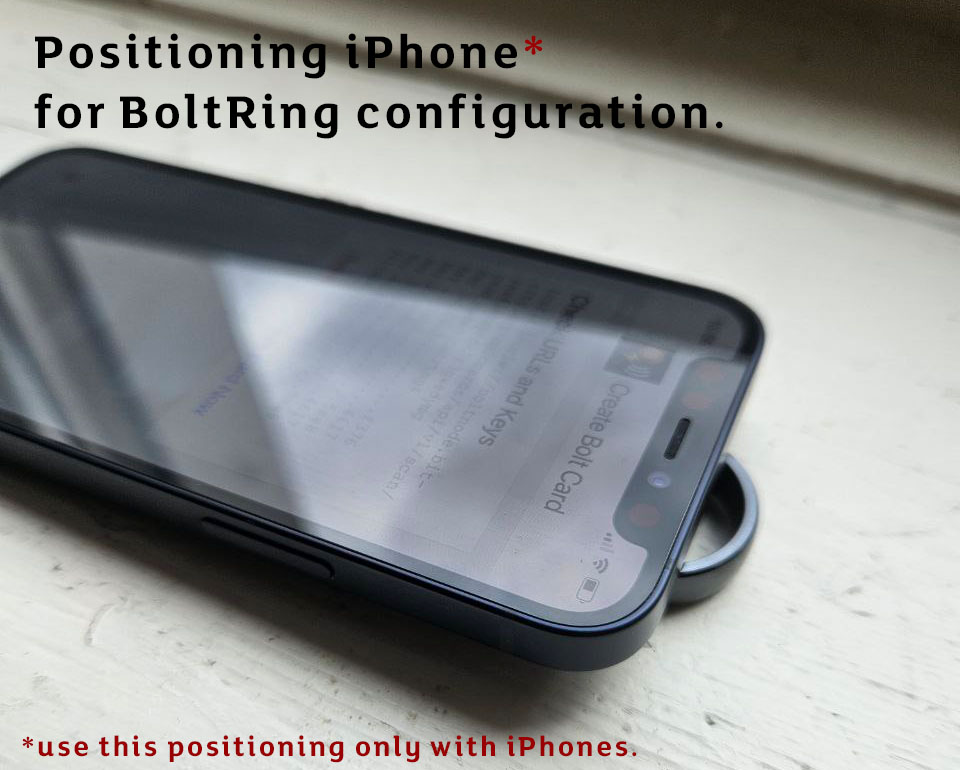
If you are using an iPhone, put it on top of the BoltRing as shown on this image before hitting the Write Card Now button.
- Go to the start screen of the Bolt Card Creator app
- On the start screen, tap
SCAN QR CODEand scan the LNbits card creation QR code - Put your phones antenna on top of the BoltRing in a stable position
- Tap "WRITE CARD NOW"
- Verify that the app
Outputsection shows all the green checkmarks
Congratulations, your BoltRing is now ready for use.